Vinyl plank
Started: 2020-08-02 19:20:29
Submitted: 2020-08-02 21:36:25
Visibility: World-readable
In which the intrepid narrator finishes his bathroom floor with vinyl plank; and also, a brief discourse on refinishing tile
Once I finished installing the shower door, bringing my shower back into use after five weeks of work, the next step was to remove the rest of the tile on the floor and replace the floor.
When we first considered fixing the water damage in the master bathroom, Kiesa found vinyl plank flooring, a newer addition to manufactured flooring that's easy to install, waterproof, looks fairly good, and is so totally standard that everyone is using it these days by default in their bathrooms and kitchens. Kiesa had picked up a couple of color samples, and we picked the LifeProof "Sterling Oak" flavor, a fake wood grain in gray.
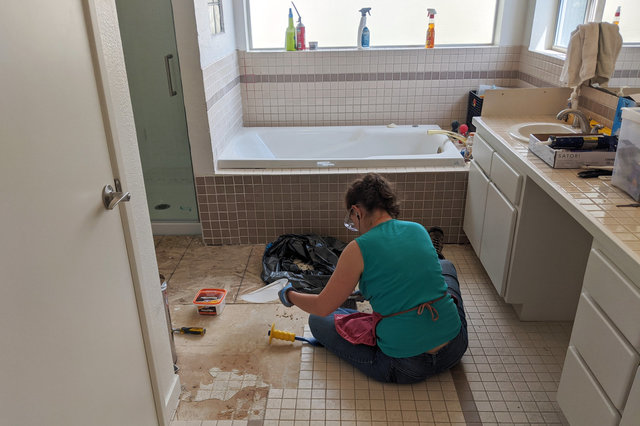
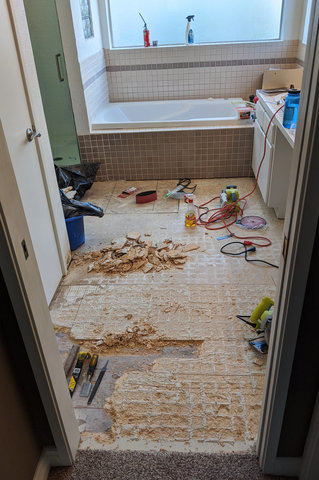
At the start of the project, I had removed enough tile on the floor to find the extent of the water damage in the underlayment and subfloor, but I left the rest of the tile in place because I was lazy, and also because the tile felt better underfoot than the scratchy underlayment. Kiesa volunteered to remove the rest of the tile, and spent most of the day on the Fourth of July working on the tile with a hammer and floor chisel. In some places enough water had worked its way through the tile that the tile came off easily; in other places, she ended up chipping away part of the underlayment board along with the tile.
I took another trip to Home Depot to get the five cases of floor planks I needed, plus a belt sander to smooth the remaining mortar and the transitions in the underlayment. The belt sander (and citrus solvent spray) worked well enough for most of the underlayment, but there was one section next to the door where the underlayment was badly pitted while removing the tile, so I undertook to remove the underlayment in this section. (Instructions I read on the Internet were clear that I ought to remove the underlayment board and replace it, so I had a brand-new surface to install my floor on, but I didn't think that was necessary for all of the board, just the pieces that were badly pitted.)
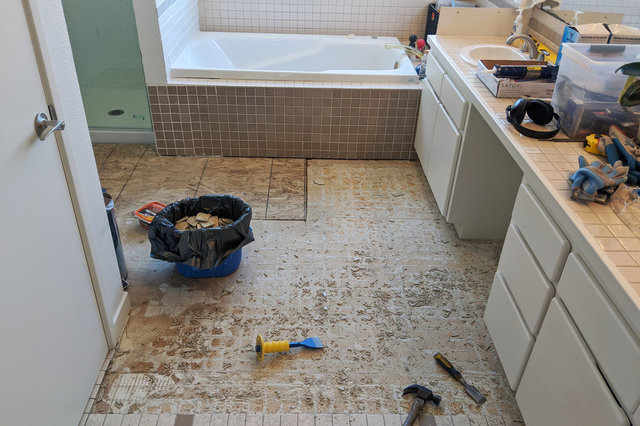
This proved much easier said than done. The underlayment had been attached to the subfloor with an aggressive adhesive, and I had trouble separating the layers of the floor with my selection of hand-tools. (It occurred to me — later — that a heat gun might have been useful here, if the adhesive would soften at higher temperatures that were still below the burning point of the underlayment, and if I could apply enough heat to the adhesive at the right points. But that would have been another tool and I didn't really want any more tools at this point.) I asked my favorite search engine for help and it suggested an oscillating tool, which would let me cut and scrape at speed. I had already bought one power tool that day (the belt sander) but I drove to Lowe's and picked up a Dremel-branded oscillating tool, plus a selection of blades, trash bags (this time I found and bought 3-mil-thick contractor clean-up bags, several times thicker than the consumer-grade trash bags I had been using, which were not strong enough to stand up to the debris I was storing in them), and another sheet of oriented strand board for the underlayment I was replacing.
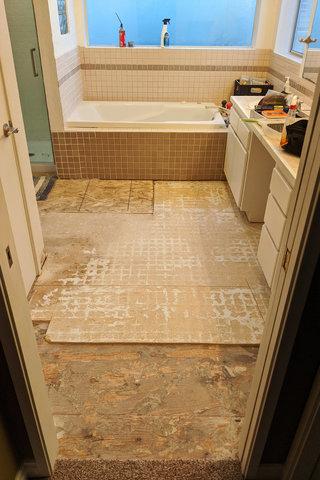
The oscillating tool was not the silver bullet I had hoped it might be, but it was a major improvement on the chisel and pry-bars I had been using. I scaled back my ambitions, judging that part of the underlayment was in adequate shape so I didn't need to remove it too, and managed to remove an adequately-sized section of underlayment, exposing the subfloor below.
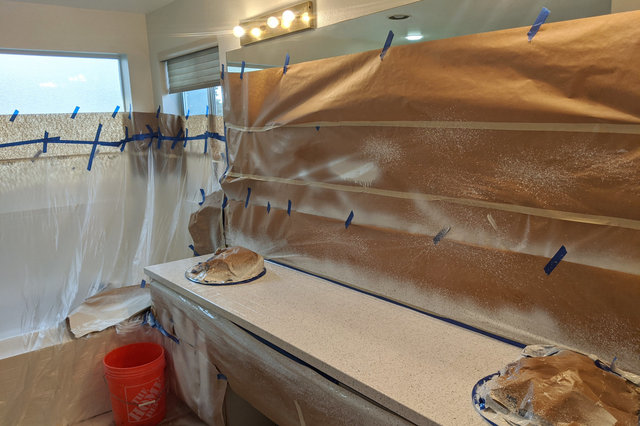
Then I took a brief hiatus while we had someone come in to refinish the remaining tile in the bathroom. As far as I could tell this was basically cleaning the tile, patching any flaws in the tile, then painting and sealing the tile and the grout a high-gloss seal. (I decamped from my office in the master bedroom to the office on the ground floor to avoid the stench of the volatile organic compounds while they were working.)
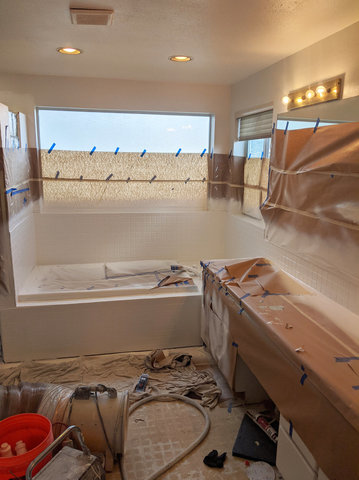
We wanted most of the tile to be white, to match the new tile I'd installed in the shower, but the tile refinishing contractors thought it would be better to paint the horizontal surface of the countertop something other than pure white, so we selected a white with black flecks (that was supposed to be like a granite grain or something, but I wasn't totally thrilled by the way it turned out). This meant the project took two-and-a-half days: one day each to mask and paint the white tile and then the countertop, and a half-day to clean up after everything had dried.
I took advantage of the lull while the countertop was drying to install a new piece of underlayment in the gap I'd cut in front of the door.

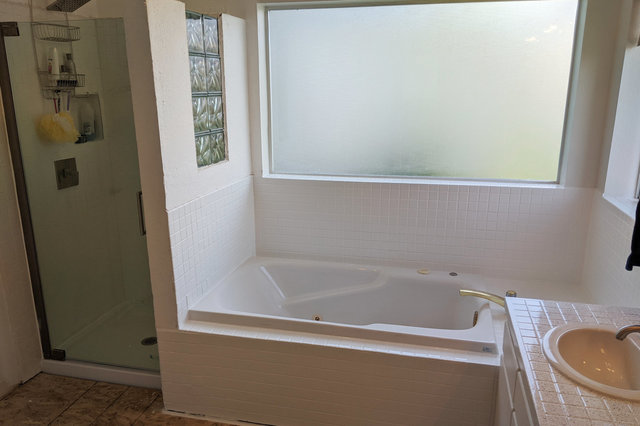
I wasn't totally enamored with the way the tile refinishing covered both the tile and the grout in the same color and gloss of paint, but it was a distinct improvement over the tile we'd had before.
After the tile refinishing wrapped up on Wednesday I returned to my office in the master bedroom; then I spend the evening laying the vinyl plank on the floor.
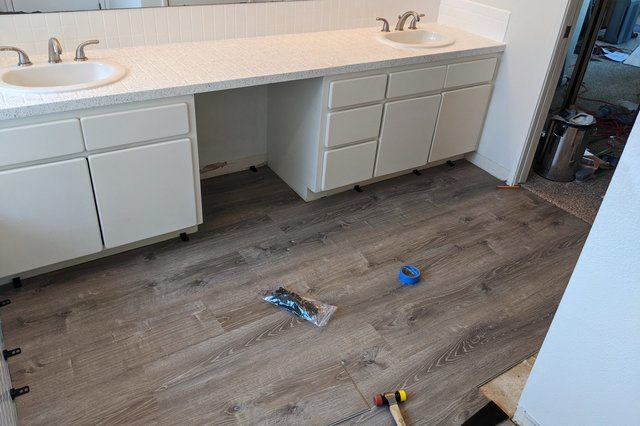
The vinyl plank was, as advertised, easy to to work with. Each section snapped into the adjacent sections with tongue-and-groove fasteners, and they sealed in place when I used the "profiled tapping block" (in the floor installation kit I bought) along with a mallet (also in the kit) to force the pieces together. I could tell where the seams were in between the planks by eye, because the grain wasn't continuous across the planks, but I could feel only the slightest gap between the planks. For simple cuts along the small axis (to cut the plank to size if the wall were flat) I could score the board with a utility knife and snap it; but for more complicated cuts (lengthwise cuts, or irregular cut-outs for the doors or the heater vent) I used my circular saw. The style I picked formed a free-floating floor above the subfloor; I didn't attach it to the underlayment in any way, and I used spacers to enforce a quarter-inch gap at every edge. The net effect was that the floor sounded faintly hollow, with a slight tapping sound when I stepped on it reminding me that it was there.
I was supposed to cover the expansion gaps with baseboards, so that was another mini-project to repaint and reinstall the baseboards and add new boards where needed. (I don't seem to have actually taken any pictures of this though.) The bathroom had baseboards at the base of each wall, which I had removed (and numbered, so I could put them back together again in the right places), but I needed to add baseboards under the cabinets, and in front of the tub and shower. For the cabinets I bought a length of new baseboard that was approximately the same size, figured out how to adjust the blade on my circular saw to 45° to make a passable miter, and cut four new pieces of baseboard to go under the cabinet. I trimmed the caulk off the old baseboards, and painted all of the baseboards with glossy white trim paint. Then I nailed the baseboards to the cabinets, caulked the top and the corner, painted over the nails, and it looked like it was supposed to be there. Baseboard molding is the thing that no one ever notices until it's wrong, and my baseboards were good enough no one was going to look at them.
The bathroom looked amazing with the new floor (and the refinished tile), but there was one more thing I needed to do before I was done: the floor around the toilet, where I needed to remove the toilet and replace the underlayment before I could lay down the new floor.
